|
GPS2GIS Users' Manual
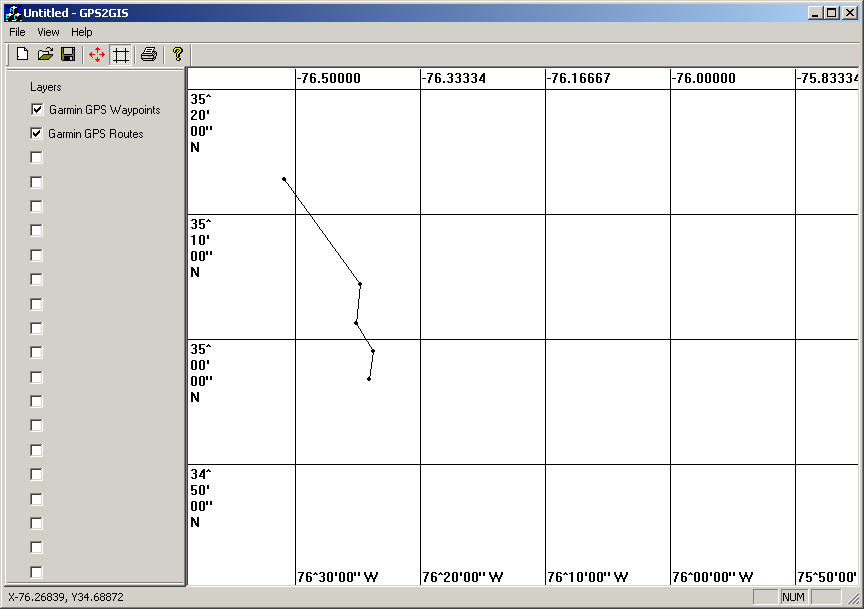
The purpose of this program is to capture GPS data and save it directly to an ESRI Shapefile. This will allow users the ability to utilize low cost consumer grade GPS products when their accuracy is sufficient for the job. Installation The program is distributed on both CD and via our website. To install from CD simple run the Setup program and follow the instructions. The program files are distributed in ZIP format on our sebsite. Use "pkunzip" or "Winzip" to extract the executable to your local hard drive. The GPS2GIS.EXE, GPS2GIS.XRF, GPS2GIS.CHM must be stored in the same directory. Create a shortcut to the program by right clicking on the desktop and selecting "New" and then "Shortcut". Use the "Browse" button and navigate through the directory tree to select the GPS2GIS.EXE file and then click "OK". Next give the shortcut a name such as GPS2GIS. Click "Finish" and your done installing the program. Display The first line across the top of the window is the title bar. If a file has been read in or saved it will give the name of the file, otherwise it will say "Untitled". The next line is the Menu bar. Click on each item to see the contents of the dropdown menu. The toolbar is next. Buttons for often used commands are located here. It is a docking toolbar so you may grab it with your mouse and move it to any location on the screen. The status bar that runs along the very bottom the window gives information about the operation in progress. During an import operation it will give the status of the data transfer. In display mode it will give you the position of your cursor. When waiting for user input it will say "Ready". The toolbar and status bar can be toggled off and on from the "View" dropdown menu. The layers box is shown along the left edge of the window. You may select which layer to display by marking the check box beside each layer.
Commands
Grid: By default a positional grid is displayed to give approximate
location. The longitude is displayed along the top and bottom of the screen. The
latitude is displayed along the left side. The grid may be toggled on and off by
pressing the grid button
Help: Use the help button
Import Garmin GPS: Use this command
to download Garmin GPS data to your PC using the Garmin protocol. Connect your Garmin
GPS to the computer with the PC data cable. These cables are available from Garmin
and are equipped with a proprietary connection to the GPS
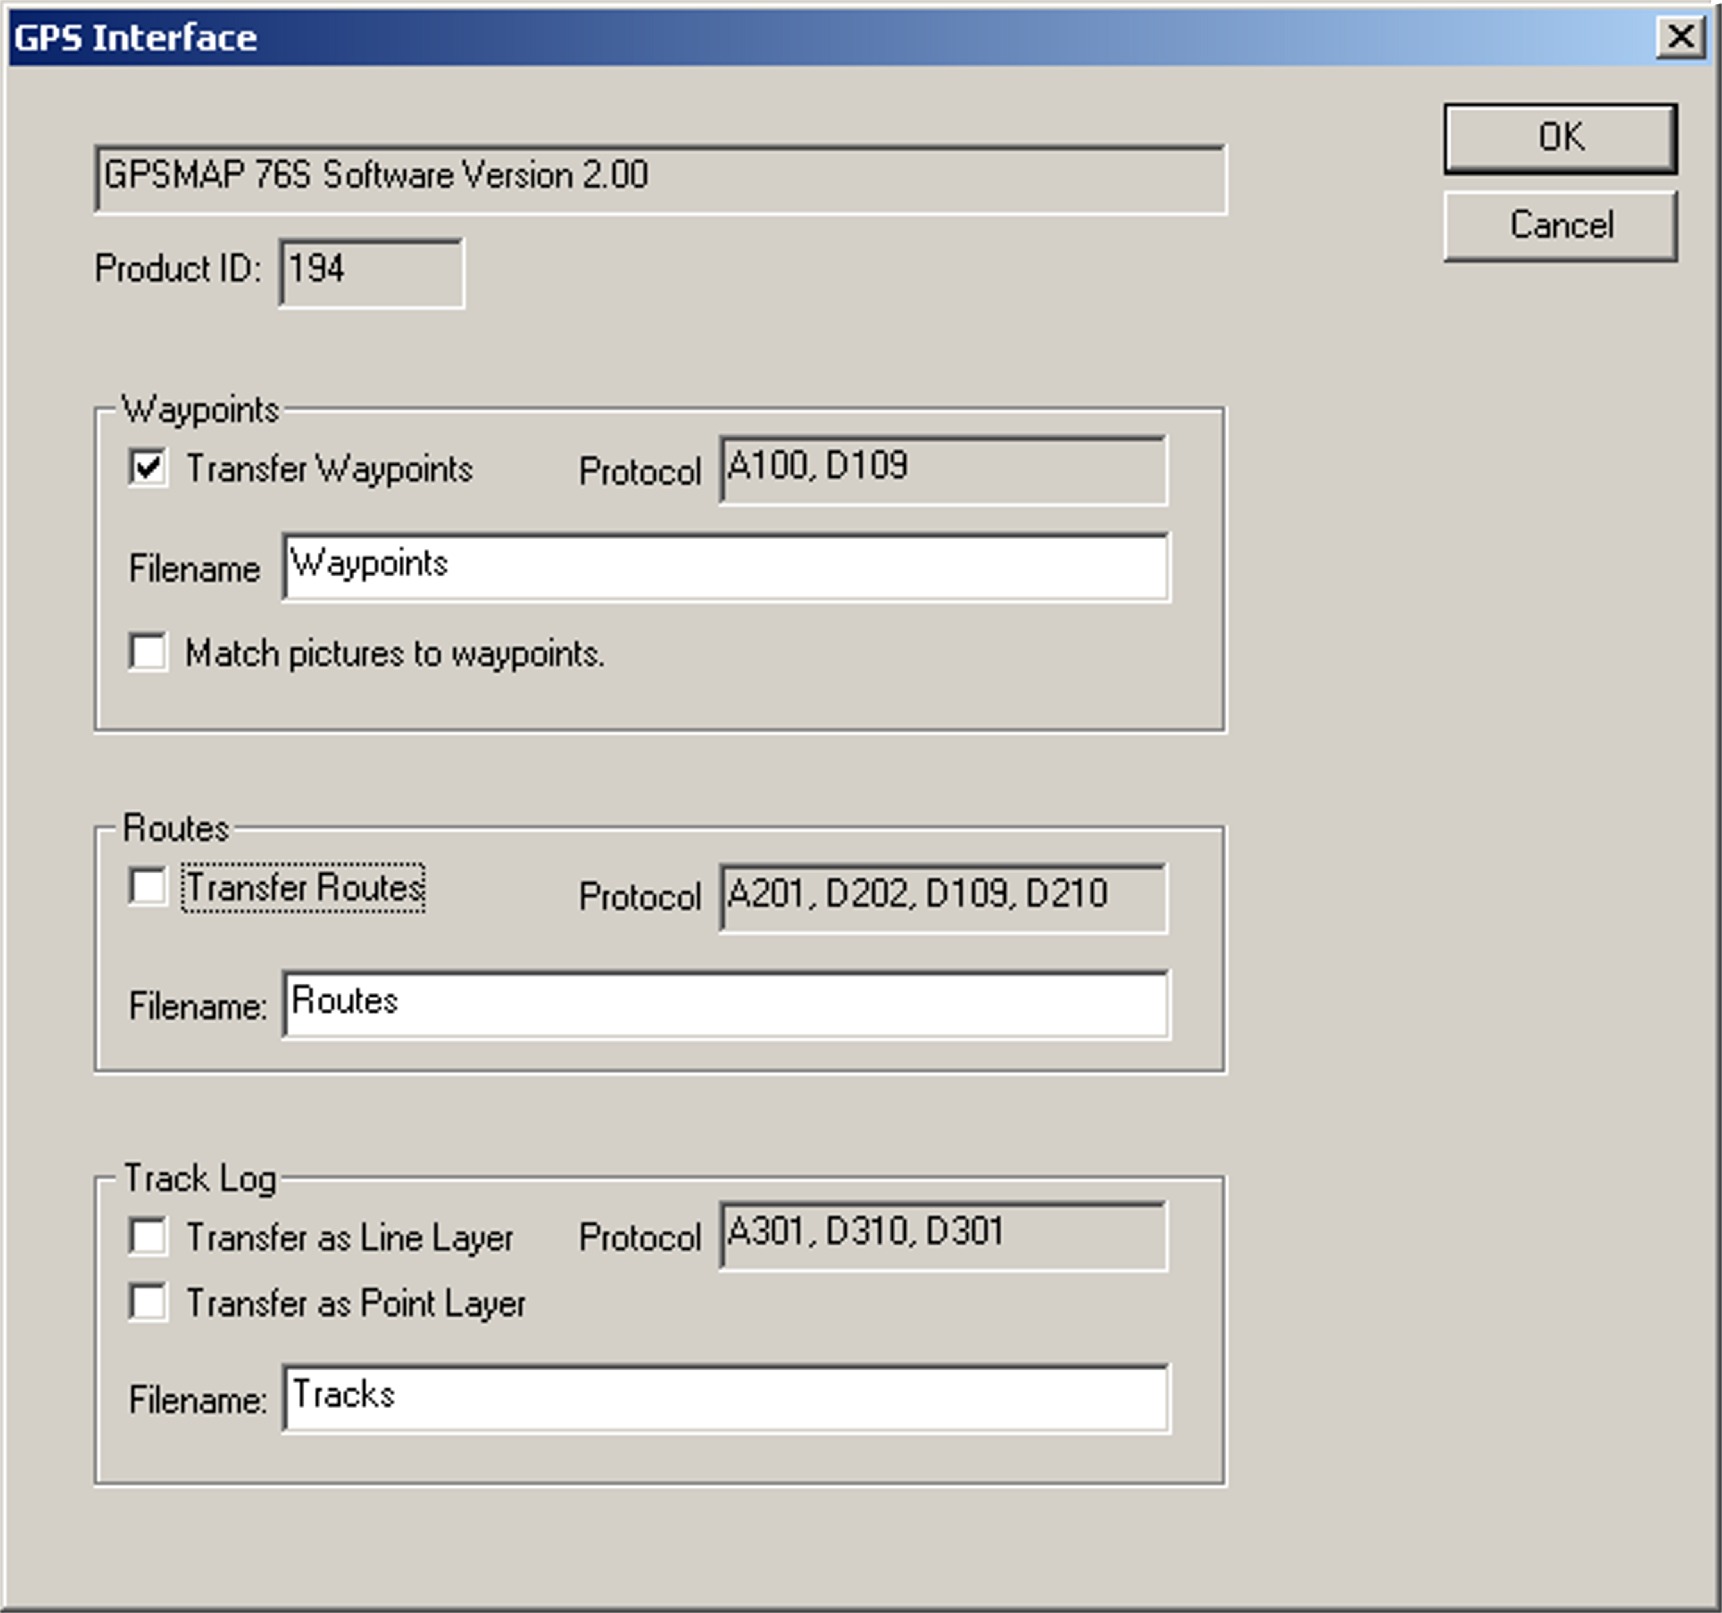
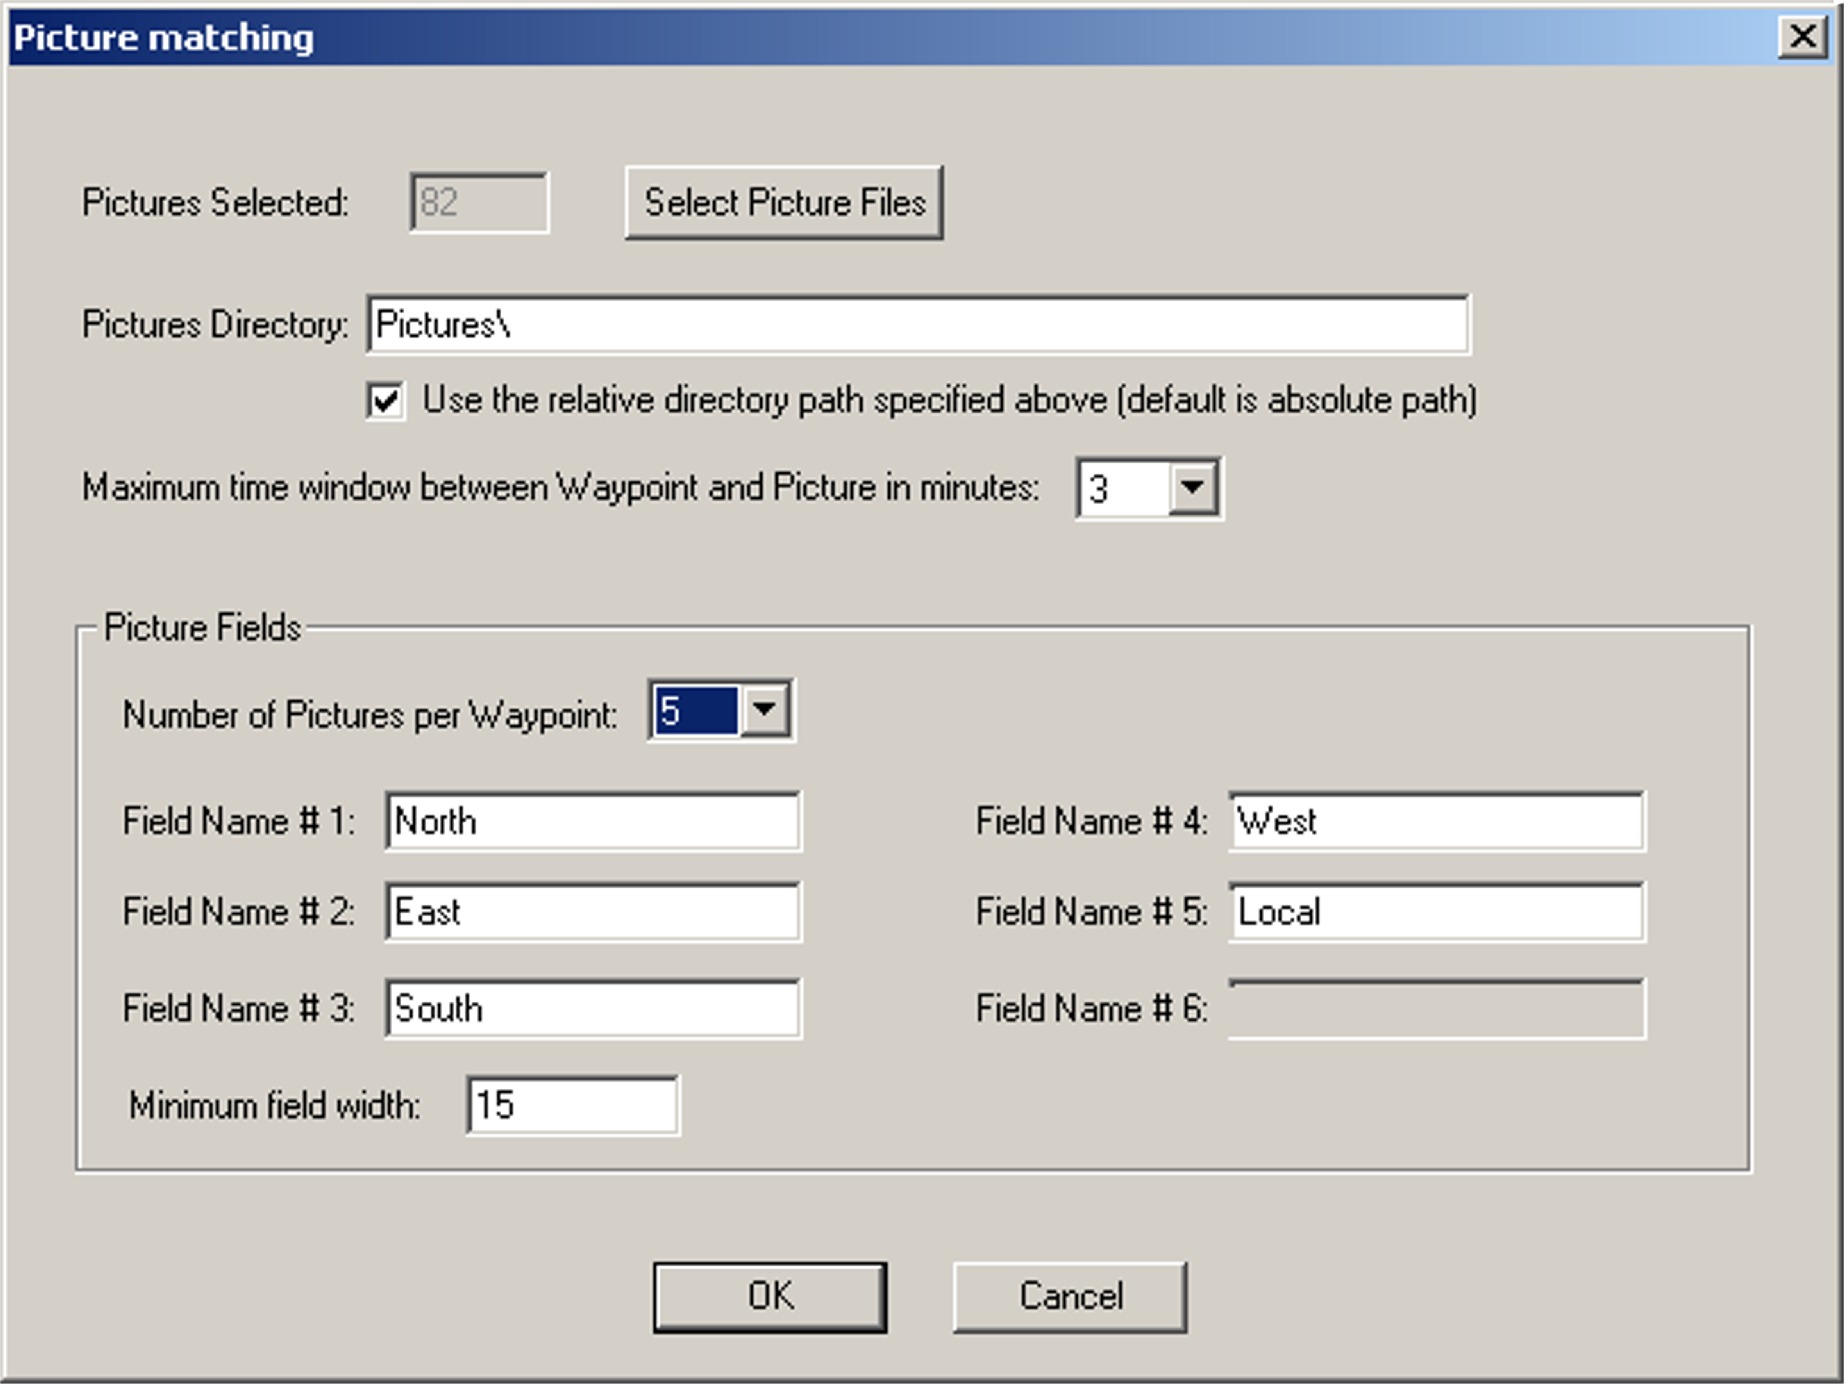
Digital Picture Matching: When you select "Match Pictures to Waypoints" in the above dialog box, the "Picture matching" dialog (left) will appear. This option will allow the user to match up to six pictures to each waypoint. The date stamp of each picture is used to match it to the corresponding waypoint. To do this YOU MUST SYNCHRONIZE YOUR CAMERAS' CLOCK TO YOUR GPS BEFORE TAKING ANY PICTURES! The picture fields are loaded based on the order that the pictures were taken. In this example the first picture that matches the waypoint will be entered into the attribute called "North", the second will be entered into "East", and so on. If there are fewer matching pictures than fields, the field will be left blank. You may change the field names to reflect the order that you wish to your take pictures in. The field named "Local" is a special case where, when there is only one picture matching a waypoint it is placed in this field, regardless of its position in the list. This option is currently only supported with GARMIN GPS units.
Import Magellan GPS: Use this command to download Magellan GPS data to your PC using the NMEA protocol. Under the Setup menu on your GPS make sure the NMEA protocol is set to the OFF position, and that the baud is set to 4800. Note that these are the default settings. This command is similar to the preceding "Import Garmin GPS" command. It uses the same dialog box as shown above. From the "File" menu select "Import" and then "Magellan GPS". Select the appropriate communications port from the "Communications Parameters" dialog box. The baud rate will default to 4800 to match the GPS unit. Click "OK" to continue. A communication link to the GPS will be attempted. If all goes well the GPS Interface box will appear. The first line has a description of your GPS unit. The second has the product ID assigned by Magellan. Waypoints, Routes, and the Track log will be saved to a separate layer if the check box is marked. By default the Track log is not saved. If you select Routes, then Waypoints will automatically be selected also. You may change the filenames if you desire. Click "OK" after you have made your selections. The transfer will begin, with the status indicated in the lower left. You may wish to try faster baud rates once you have everything working. Remember that the same baud rate must be selected on both the Magellan GPS unit and in the "Communications Parameters" dialog box.
Print: You may print the screen area if you have a printer
connected to your computer. From the "File" menu, use "Print Setup" to select a
printer, paper size, and orientation. Note that landscape mode will better match
what you see on your screen. You can use "Print Preview" to see how your print out
is going to look. Select "Print" from the "File" menu or press the print button
Save: Remember to save your data. From the "File" menu use "Save" to save your data to disk. Select the drive and directory you wish to store your files in. The filename is not important. Each layer is stored in a separate file whose name you assigned earlier when the layer was created.
Zoom: You may zoom in on any area by
dragging a box around the area of interest. Position the cursor at the upper left
corner of the box. Press the left mouse button and hold it down while you drag the
cursor to the lower right corner of the box. Release the button and the display
will automatically zoom in on the enclosed area. A one-to-one aspect ratio will
be maintained so the displayed area will not be exactly the same as your box, but
everything in your box will be displayed. You may zoom in further by drawing another
box or zoom out by pressing the Zoom Out button
Troubleshooting
Copyright © 2002-2009 by ArcProgramming Last modified: 05/08/10 ESRI and ArcGIS are licensed trademarks of Environmental Systems Research Institute, IncArcProgramming is NOT associated with Environmental Systems Research Institute (ESRI).
|
 ArcProgramming
 unit.
More than one connector type is used, so make sure you get the one that fits your
GPS model. Turn on your GPS unit. Use the setup menu to make sure the "Garmin"
serial data format under the interface tab is selected. This is the default format.
The unit should default to 9600 baud, 8 data bits, no parity, and 1 stop bit. From
the "File" menu select "Import" and then "Garmin GPS". Select the appropriate communications
port from the "Communications Parameters" dialog box. The baud rate will default
to 9600 to match the GPS unit. Click "OK" to continue. A communication link to the
GPS will be attempted. If all goes well the GPS Interface box will appear. The first
line has a description of your GPS unit. The second has the product ID assigned
by Garmin. In older GPS units the product ID is used to obtain the protocol information
from the protocol cross reference file (GPS2GIS.XRF). The Protocol boxes should
contain values similar to what you see here. Not all models support the Track Log
so this box may be empty. In the event of any problem the user should include this
information with your trouble report. Waypoints, Routes, and the Track log will
be saved to a separate layer if the check box is marked. By default the Track log
is not saved. You may change the filenames if you desire. The directory is chosen
when the layer is saved. Click "OK" after you have made your selections. The transfer
will begin, with the status indicated in the lower left. Be patient! At 9600 baud
the transfer can be as slow as 4 waypoints per second, depending on your model and
maps that are loaded.